We’ve been enjoying delicious peashoot salads for the last 3 weeks. It has been a mild winter here on Mayne Island so we have lots of delicious greens and other veggies for eating still growing outside in the garden but there’s just something about that fresh green new growth taste that is such a luxury and joy at this time of year. And for folks who live in snowier climes, it’s really a treat!
Below is a photo of the first harvest of peashoots mixed with outdoor winter spinach. What a delicious wintertime salad, yum!!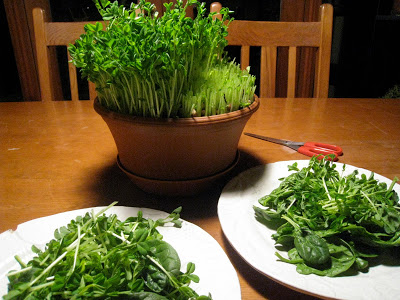
I’ve been growing these decorative pots for the past 3 winters and almost everyone who sees them on my table wants to grow them too! They’re really fun and easy to do.
So here’s how I do it:
I begin by measuring how many peas I need to cover whatever pot I choose to use for growing. I then soak the pea seed in a bowl of water for about a day, making sure the water is covering all the peas by an inch or so because as they soak, they’ll absorb alot of the water and I don’t want them to dry out.
Once the peas have soaked, I fill the container with potting soil, making sure to leave quite a bit of space between the top of the soil and the top of the pot. This is because as the peas send out roots and greens, they’ll expand and fill the space and if there’s not enough of it, they’ll pop out of the pot. That’s what happened to me the first time I did this and it was very disappointing!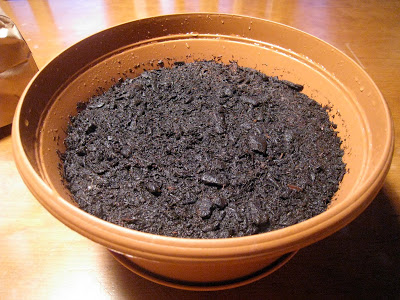
I water the soil to get it nice and moist and settle it into the pot. Then, I layer the pea seed on top so I can’t see any soil through the peas. This is why it’s important to measure how many peas I’ll need for the pot I choose to use before I soak the seed. I don’t want to waste any extra soaked seed and I also want to make sure I have enough to cover the soil nicely….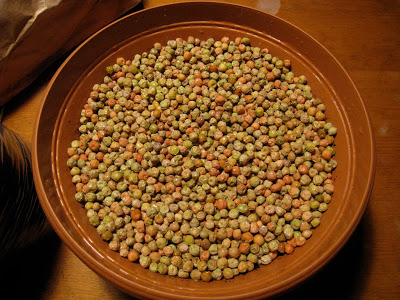
Then, I cover the seed with a very light layer of potting soil, just enough to keep the peas moist. Most of the time, I can still see some of the peas on top, they don’t have to be completely covered. Also, I like to use a potting soil that’s certified organic so I know there aren’t any synthetic fertilizers or moisteners added to the mix that my food is growing in….something to think about….in this photo I’m using SeaSoil potting mix. I give it one last watering with a fine sprinkle from a watering can or my mister bottle works really well too…..I sit the pot in a plastic tray to catch water that drains…..I continue to water the top with a mister bottle to keep it moist (about twice a day) and I also keep the bottom tray filled with water…it’ll wick up into the soil in the pot and soon I begin to see roots coming out of the bottom of the pot!…..and I wait and watch…..
The peas 4 days after they’ve been planted into their container….little white roots and bits of green appearing….exciting! See how they’re expanding and filling up the top of the pot too.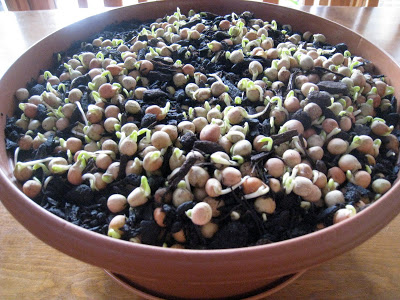
6 days after planting in the pot….I think we’re going to have a crop!!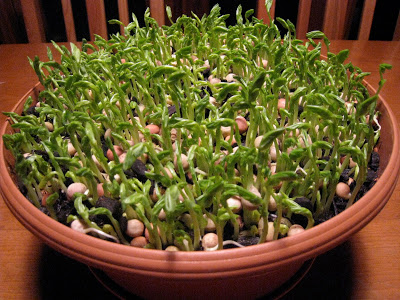
Tadaaaa!! Ready for harvest…..8 days after planting, 9 days after soaking. The timing will vary depending on the temperature of the room….this container sat on the table very close to the warm woodstove so it grew quite quickly…..after the first cutting, I continue to water the pot and the peas will send out new shoots again!….and sometimes even a third time…by the third time though, I’ve noticed that they’re not quite as tender and juicy as the first 2 cuttings…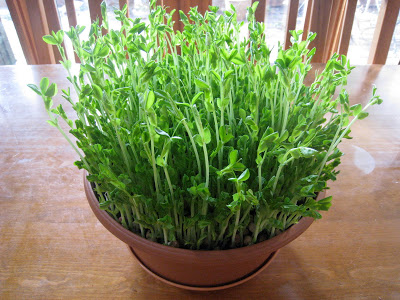
Delicious and nutritious! I read somewhere that pea shoots are packed full of Vitamin C, Folic Acid and Vitamin A.

That's so cool Christina. Can you just use dried peas from the grocery store?
By the way, what's the size of that container? From the photo it looks like it's bigger than the dinner plates.
Yum! I'm going to try this! Thanks for the post. Great photos.
Mirabella: Thank you for your interest : ) I'm so happy to know you're going to try it. I think you're gonna love it!!
Jim: ooops, I see here that I haven't answered questions from way back last year….I've never tried to use dried peas from the grocery store. My first thought is that they probably wouldn't work very well…and it may be split peas you're thinking of which is a different thing. I use a type called Dwarf Grey Sugar (available at West Coast Seeds), but I expect that any kind of snow pea will work well. The container is 10" diameter.
Thank you so much for the information! I have been wanting to grow pea shoots for some time, but was unsure how to do it. Your instructions are so easy to follow. The peas are soaking and will be planted tomorrow.
You're so welcome, Terri!! I'm really glad to know the instructions have helped you get on the pea shoot growing bandwagon! May you have many happy harvests : )